Showing posts with label Cake. Show all posts

Friday, March 30, 2012

Cardamom dry fruit cake


A day to go to reach a small milestone in my own blogging world.  Thank a lot to all of the enouragement.

Milestones have to celebrated, right? Right. So to celebrate the milestone and as a Thank You for all of you who dropped by, here is a Cardamom dry fruit cake. A simple cake with a lots of flavor. Often I try cakes using condensed milk , but this cake I tried with evaporated milk.

Ingredients :

1 1/4 cup -- All purpose flour
1 cup  -- Evaporated milk
3/4 cup -- Light brown sugar
2 nos -- Ripe banana
6 tbsp -- Unsalted butter
1/4 tsp -- Salt
1 tsp -- Baking powder
1/2 tsp -- Baking Soda
2 nos -- Cardamom
1/2 cup -- Chopped nuts and dried fruits


Method :
--- Pre-heat the oven to 170 C or 350 F.
--- Grease a 8" pan with butter.
--- Heat the evaporated milk along with sugar and butter, until the sugar dissolves. Let the milk to cool.
--- Meanwhile shift the flour, baking soda and baking powder.
--- Powder the cardamom and add to the dry mixture along with the dry fruit.
*** Here's a small tips to powder the cardamom. In a blender take few spoons of flour and add the cardamom and blend it  to fine powder. If using for any other sweet or dessert, blend the cardamom with few spoons of sugar. So that you will not get the cardamom pods while enjoying the dessert.
--- Mash the ripe bananas without any big lumps and mix it to the milk mixture. Add a 1/4 tsp of salt to it.
--- Add the dry ingredients in batches to the wet ingredients and mix well. 
--- Pour the cake batter into the greased pan and bake it for 25 to 30 minutes, till its done and a tooth pick inserted comes out clean.
--- Cool the cake completely before serving.
--- You can serve the cake with or without frosting.
--- I frosted my cake with a thin layer of simple banana chocolate cream and dusted with dry coconut flakes and sliced almonds.

You can enjoy the flavor of banana, coconut flakes, cardamom and dry fruits in every bite.

Saturday, January 1, 2011

Welcome 2011

Wishing you all a very happy and wonderful New Year!!
 Year 2010 left many good memories and brought many new friends. It was a very special year for me. Thanks to all followers and fellow bloggers for your support. When I started the Preethi Bhojan, I did not know anything about the food bloggers community, about the events they conduct, how to present a recipe, but now my whole world has changed.

Hope 2011 also brings me many more friends to me.

On new year day in my home town, early morning we go to a Perumal kovil near our home . Morning twilight, margahzi month chill mist, big rangoli kolam to welcome new year, a divine smell inside the temple, prasadam, Tulasi thirtham, Oh I am missing them. But not the chillness, because it is biting cold here.

This is my first post of the year, so let us start with the super double layered chocolate cake and welcome the new year.

I baked this cake for a dual purpose, new year special and for my project submission. As I mention in my earlier post, I did this cake for my cake decoration class. Since the theme and designs were our choice I selected this theme. So what theme in this?

I started with a winter theme and ended with a sunny theme. Winter theme, blue sky, tall tree branches without leaves, nice fresh snow and a welcome message for the new year. As I started working on the decoration, I changed the whole theme. Now this represents the Bahamas . Blue sea, Brown shells, big flowers, green branches. This theme is like modern art, so visualise the Bahama beach and look into the cake again, you will get it !

For recipe, click here
Followed the same recipe, which I posted last year in my another blog. I am having a 10 " pan now. So I increased some ingredients.
*** All purpose flour -- 1 and 3/4 cup
*** Sugar -- 3/4 cup
Rest all the ingredients and the methods are same.


Since this was a big and tall cake, I was able to to share the joy along with this cake to many of my neighbours.

photo from Google Images


Thursday, November 25, 2010

French fruit cake

Baked this cake last Sunday, for a birthday party.


Wanted to surprise all with a different cake than my usual one. I was planning a cake with lots of decoration using the fondant icing. Since I did not have enough knowledge about it,  was little afraid to take a risk on a birthday cake. When I was talking about this with my husband, he suggested me to use some fresh fruits in the cake, because he likes my Pineapple upside down cake a lot. This kindled some idea and planned to decorate the cake with colorful fresh fruits.

Birthday means colorful, fun and joy. So I did colorful cake. Double layer Chocolate cake, white color frosting cream, and fresh fruits on top, sliced almonds with skins on sides.

Ingredients :

For Cake recipe
 2 1/2 cup -- All purpose flour
 1/2 cup -- Cocoa powder
 1 tin -- Condensed Milk
 1 cup -- Butter
 3/4 cup -- milk
 2 tsp -- Vanilla essence
 2 tsp -- Baking powder
 1 tsp -- Baking soda
 1 cup -- Chopped nuts and Raisins
 7-8 -- Sliced Pineapple rings**

For Decoration
 2 box store bought whipping cream
 Fresh strawberries halved**
 canned Orange**
 Sliced skinned almonds

Method:
--- Pre-heat the oven to 350 F, and grease the 2 nos of 8"pan. If you are having only one, not to worry  grease one pan and keep it ready. Once a cake is baked we can bake other in the same.
--- Melt the butter and cool it. Add milk, condensed milk and mix thoroughly.
--- Shift all the dry ingredients. APF, cocoa powder, baking soda, baking powder.
--- Add the dry ingredients in batches to the wet ingredients along with Vanilla essence.
--- Mix well and make sure there are no lumps. Now add the nuts and raisins to the cake batter and fold the batter from the center to mix the dried nuts and fruits.
--- **I wanted a layer of pineapple in between the cakes, so in one pan I arranged the pineapples rings on the bottom.
--- Pour the cake batter in both the pans. Eyeball measuring half quantity in each pan.
--- Bake the cake in 350 F for 35 - 40 minutes. If using two pans, keep changing the pan in the racks in equal time interval for even baking. If using one pan, bake a cake first, cool completely then take the cake out. Wash the pan, grease it and follow the same procedure.

--- Once both the cake are done, cool the cake completely.
--- Mix the whipping cream with a dry spatula and keep it ready.
--- With a knife cut the top bulged portion of the cake. Apply a little cream in the center of the plate or board in which you are going to mound the cakes. This is to avoid the movement of cake on the board or plate.
--- I kept the pine apple cake as a down layer. If you are doing without that, keep any of the cake. Upside cut portion to be kept down. Now apply the cream on the top.
--- Take another cake and place it on the cake with the frosting, make sure you are keeping the cut side down. Again like upside down.
--- Using a clean big spatula, apply generously the icing cream on the sides and then gradually move to the top. If you feel the icing is little too jelly to handle the icing on the cake. Keep the cake into the freezer for 15 to 20 minutes and then work again.
--- If you see some dents and marks on the icing, no problem. We are going to apply a nice nutty layer on the sides which will cover everything.
--- Take handful of sliced almonds and pat it down on the sides.
--- On top of the cake, according to your desire decorate with strawberries and oranges.
--- You can use any fruits and decorate. No STOP sign for your imagination

Photobucket


Monday, November 1, 2010

Chocolate Cake Balls

Happy Halloween.
Isn't the cutie nutty balls are attracting you to grab one ?


Last Thursday, we went out for a 3 day trip to Smoky Mountains with couple of our friends. For any trip, I always take our foodie bag with lots of food which can stay for a couple of days. This time my husband wanted me to make Choco cup cakes for the trip. Since we planned to start in the evening, I spent the whole day in cooking. I had the Choco cakes as a last item in my list, because it will take only 30 - 45 min.

The clock flashed 4.00 and I tuk, tuk grabbed all the ingredients and made the choco cake batter. Turned the oven on to 350 F and poured the batter into the tray and baked it. Once done, took the tray and kept aside for the cakes to cool. The cup cakes were looking exactly the same as I baked last time. Meanwhile I was getting ready and packing all the baggage.

I was so happy and excited to take those cup cakes out from the muffin tray, unfortunately I couldn't :((
Those cup cakes were not coming out of the tray. Think, I forgot to grease and flour the tray in a hurry. Though the cake was fluffy and nice, I was able to take only the top part not the whole cake. Sad story !
Didn't have anytime to think about the cakes, wrapped the tray and placed it in the fridge and went. We were back from the trip on Monday. Wanted to do something out of the cake, which is lying in the fridge for 4 days.

While searching for a recipe to fix, found this Cake balls recipe, for a moment I went ..... speechless. Next second, felt so happy and relived from a great tension.
This is the best recipe when we have cake leftovers. Easy to make and tasty to eat.
Here comes the recipe...

Required Ingredients
--- Left over cake (I had chocolate cake with lots of nuts and choco chip)
--- 1 box Frosting cream (I used store bought Pillsbury, Vanilla cream)
--- 1 pack Mini Chocolate chip ( I used Semi sweet)
--- Nuts (optional)

Steps
--- Scratch the cakes into very small pieces.
--- According to the cake quantity, add the frosting cream and mix thoroughly.
--- Make small balls.
--- Line all the cake balls in the cookie sheet and refrigerate it for 3-4 hours
--- Once the cake balls are harden enough, Melt the chocolate chips and dip the above cake balls.
--- Again refrigerate all the balls.
--- You can serve these balls with chocolate coating or else you can roll them over the nuts and also form a nutty layer on top.
--- Either way the balls will be delicious to eat.

Photobucket


Sending this chocolate treat to Madhuri Kumar's, Cook-Curry Nook for her 1st Anniversary celebration.

Tuesday, October 26, 2010

Easy Choco cup cakes

I did this cutie cup cakes a month ago along with my cute kutti friend.


Her name is Kirthana, 2 yrs old, my best friend in our neighborhood. She is very naughty, but very sweet. We both watch, sometimes even dance for rhymes and Tamil songs. As of now, songs from film Boss enkira Baskaran and Enthiran tops her favorite list. But her all time favorite is Aayarpadi Mailigayil song.


I will not go to my kitchen when she is around with me, first of all she wants our full attention and my laptop. Next reason as you all know, working in oven with a naughty little is very difficult. Hats off to all Moms !
Of course I baked this easy choco cup cakes when her mom was with us, she is equally sweet. Like mom, like daughter. She is another person who always appreciate my cooking and blogging.

One day when we both were talking, I was telling how easy to bake a cake and what are the essential things we need to bake a simple and tasty cake. Also about the variations we can do having one base recipe. While talking, I just grabbed all the available ingredients from the pantry and started working on this cakes.

Now comes the cake story...This cake again I bookmarked long ago from Cook curry-nook by Madhuri Kumar. But I did little substitution and variation and baked in conventional oven.

Ingredients:

In Madhuri's cake, she used Flax seed 4 tsp substituting 4 eggs. I didn't use any, instead I used 1/2 cup of Milk powder + 1/2 cup of milk.
Also for a little extra taste I added 1/5Th cup of strong brew coffee.
For decoration I used 1/4 cup chocolate mini chips and toasted almonds.
Rest all the ingredients same. You can find the actual ingredients and the recipe here.

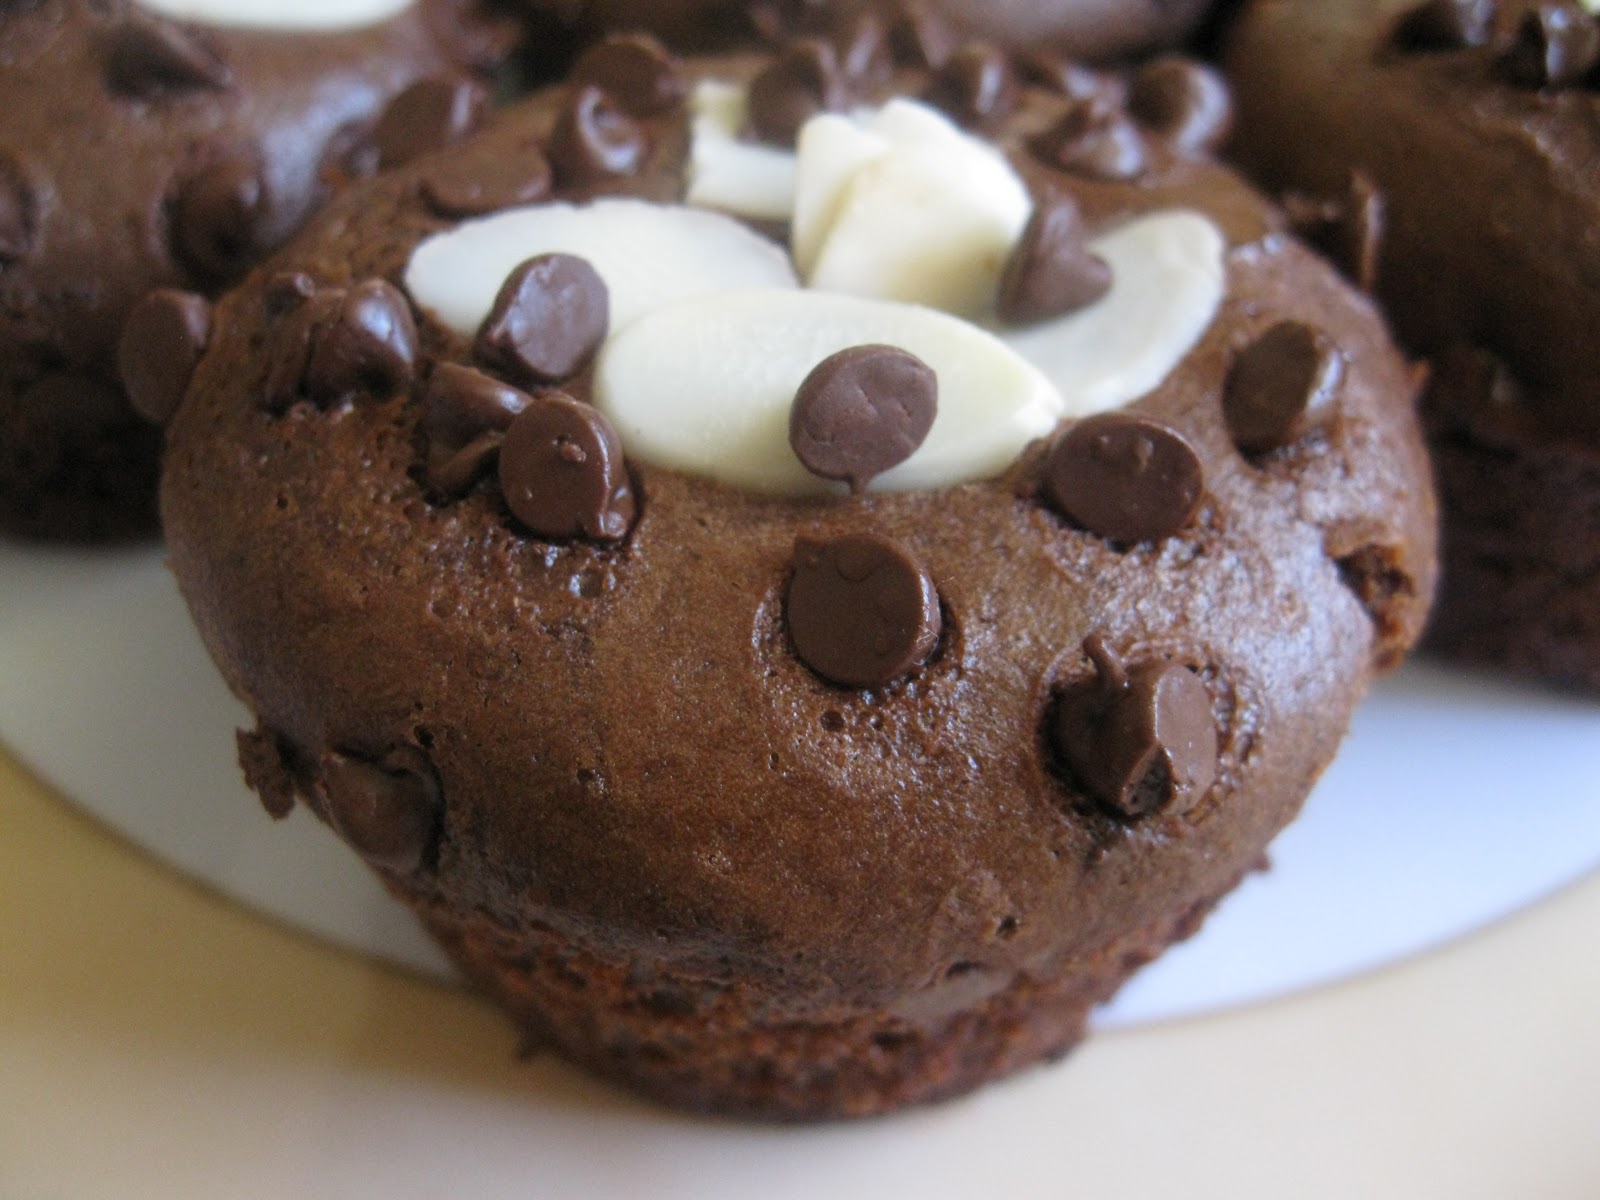
Instead of baking in 8inch pan, I poured the cake batter in muffin tray. On top of it I sprinkled the mini chocolate chips and some toasted Almonds. After 20 min , sweet choco cup cakes are ready.

Wednesday, September 29, 2010

Pineapple Upside down Cake

I baked this delicious looking and tasting Pineapple upside down cake yesterday. Doesn't this look pretty !


You all might be wondering where this girl vanished suddenly. She has been cooking and baking so many dishes and giving sweet surprises to her in-laws. What to say friends, my in-laws shortened their stay here and flew back home last Monday :(

I am having so many new informative things and recipes to share with , but since the time they left the home seems so empty and dull without all the constant buzz . Absolutely no cooking for first 3 days and survived with frozen rotis. Slowly I recovered and started seeing my routines in Food network shows. In one of the show I saw a similar cake using corn meal, so wanted try it. Same day I bought cherries and pineapples.

I will always take a month to try a recipe after book marking it , luckily this time I tried Pineapple upside down cake within two days. Found this wonderful recipe from " Cooked Dil Se..." by Siddhi. This is again a recipe where I faced couple of challenges.
First thing in the morning found my oven door broken and thanks to my apartment guys, for fixing it quickly. The original recipe has a stick of butter. Oops, I forgot to buy it.  Want to know what I did, tadaan, replaced it with 1/3 cup of vegetable oil.  Also added lots of walnuts and Raisin for more taste.

That's it poured my cake batter on top of  pineapple and cherries and baked it for 40 minutes in 300 F. Once baked cooled the cake in the pan for some minutes then turned the cake. I can't believe myself, at last I baked pineapple upside down cake... Huh huh can't wait to share with you all...

Photobucket


If you want to give it a try, you can always find the recipe here. Enjoy !!!

Thursday, August 12, 2010

Graham crackers cocoa Burfi

This is another recipe like Chocolate Brownies where I started with one recipe and ended with another. Wanted to include this dish in my earlier post 'Need another attempt' , since this recipe also has a nice story I wanted to post it separately.


Graham crackers coco burfi, I chose this name for the burfi.
I wanted to try 'Nanaimo bars', the three layered chocolate desert from Chef In You. Since I am a chocolate lover, wanted to eat this chocolate, nutty bars. On fine day, I started this. Since this recipe has 3 layer I started with the first layer.

OK, let me give a short break to the story and see some facts about 'Nanaimo Bars'

The Nanaimo bar is a dessert of Canadian origin popular across North America. Made of chocolate no-bake square, it is named after the West-Coast city of Nanaimo, British Columbia.
The bar originated in Ladysmith south of Nanaimo in the early 1950s. Mabel Jenkins, a local housewife from Cowichan Bay, submitted the recipe to the annual Ladysmith and Cowichan Women's Institute Cookbook. The first printing of recipes featuring Nanaimo Bar ingredients is found in the 1952 Women's Auxiliary to the Nanaimo Hospital Cookbook. They are referred to as the Chocolate Square or the Chocolate Slice. Some say the first use of the name Nanaimo Bar was in an Edith Adams cookbook printed in 1953. (Facts from Wikipedia)

Welcome, after a short break :))

I was nearing the finishing stage of first layer, enjoyed the moment as if I finished making the whole recipe. There started a problem, all the ingredients were still not bound together to form as base layer. Again I went to the site and read all the ingredients and steps. Oops , I over looked a main thing which binds all :((

That main thing is egg !!! Now this is a problem :-(

Gave some work to my brain, took the milkmaid can from my pantry shelf. Without any measure I added half a tin to the base mixture. Now, the whole mixture become little gooey. The whole joy vanished in a moment, one good thing I did was didn't started anything for next two layers. Wanted to make some good sweet out of the mixture.
Tadaan, tadaan, tadaan... Background music.

In a sauce pan I added 2 tsp of milkmaid and 6-7 tsp of cocoa powder mixed well. Turn on the flame very low, after 3-4 minutes added the gooey cocoa, graham crackers, almonds, coconut mixture and mixed well for few more minutes, Until it formed more solid gooey mixture. Transferred that in to the greased pan. After few minutes, cut them and made nice coco burfis.

Dear All, wish me luck, I am going to try Nanaimo bars again next week :))
Hit or flop I will share with you all.

Friday, July 16, 2010

Sweet Surprise

After the food mela event, I was bit busy in other work, so took a break for a week from my blogs and was doing some cleaning and clearing work to welcome my in-laws. Oh yes, they are here with us now. I am so happy :))

The chocolate cake which I made last week for the Food mela tasted good. It melted like ice cream in the mouth, everybody enjoyed it and appreciated me a lot. End of the day nothing left for us. I decided to do the same to give a sweet surprise to my in-laws when they come home.


 Instead of chocolate cake I tried cup cakes. The recipe was exactly the same, instead of baking in 8" pan I baked them in a muffin tray with reduced timing. With the store bought frosting I decorated them.


After a tedious 24 hour journey, as soon as they entered I gave them a good coffee and surprised them with these cupcakes.

Saturday, June 26, 2010

My Milk story - Milk cake

As always last week I bought 2 gallons of milk. Normally I finish it off with in 2 weeks.

Daily my hubby has it along with cereals for breakfast, but last couple weeks he is getting up late and almost rushing to office straight from the bathroom. Also I make my own fresh curd every 2 days, this time it also failed me. For the past one year I have been making my own curd as a daily ritual and excepting just a handful of days it use to come beautifully well. Wondering what happened this time, my milk is not turning as curd at all. I tried options like putting a chilly and a very small piece of tamarind in the milk along with the curd but still the curd was not good. Left with  no option, I started buying 'Desi curd' from Indian grocery

I had a gallon of milk left in my fridge with yesterday's expiry date. I felt terrible about having to throw it all away.  So I started searching Milk sweet recipes. Suddenly I thought of my Auntie who once sent us a milk sweet from Chennai. It was fantastic. Last night, I called her, took the recipe and tried it in a litre of milk.

Milk cake - Easy available ingredients but time taking process. Though its a little painstaking process in the end all your effort will be rewarded.

Ingredients : 5 measures of milk, 3 measures of Sugar and 1 measure of Ghee
Procedure : Mix all the ingredients and boil until the milk mixture becomes one third. Stir it becomes to the Halwa stage.
Time : 3.30 hrs

The aroma of the milk sugar mixture filled my whole room. It took 2 hours to come to a stage of condensed milk.


Nobody can go wrong with this recipe. In different stage we can get different kind of milk sweet.

Stage 1 - After 3 .15 hours the milk will be in a molten lava stage, called 'Theratti pal'. A famous south Indian dish.

Stage 2 - Further boiling will thicken the milk more. Now you can pour it on to a greased tray. Cut in to desired shapes. It will be bit soft like the one below.


Stage 3 - Boil the mixture until it leaves  the sides of pan. Then as usual pour it on to the greased tray, cut it and eat it. This will be hard milk cake.

In any of these stages the end result will be a sweet and delicious one. Enjoy the Milk sweet :)