Friday, December 23, 2011

No-bake brownies

A couple of weeks ago, these two cute little Reindeers appeared in my house along with a very cute and small Christmas tree. How sweet !
These two cuties kindled me to go and work in the kitchen for Christmas celebration.

Photobucket
Last year I made lots of cookies, Bourbon biscuit, choco cookies, coconut macaroons, Oh the list goes long. You can find all the recipes here. This time I started with no-bake brownies.

No-bake brownies are very simple, with simple ingredients like a pack of Marie biscuit, chopped nuts, cocoa powder and a tin of condensed milk. As the name says, no need to bake or cook. All you need is patience.


I tried this recipe from 'Cooking and me' by Nags. You can find the recipe here from her site.

In addition to her recipe, I added one of my favorite ingredient which made the brownies extra special. The secret ingredient is none other than peanut butter. To the brownie mixture I added 1/4 cup of peanut butter, rest all I followed the original receipe.


Since I used the peanut butter, I think my brownies were little fudgy. But the taste was wonderful. It reminded us the taste of Ferrero Rocher. Karthik started calling those brownies as Ferrero Rocher.

You will not believe me I bought a small pack of Ferrero Rocher the day I made the brownies and I am happy to report that the Ferrero Rocher is still there in the fridge while my brownies are long gone!!

Merry chrismas to all.

Monday, December 19, 2011

Nutritious lentils


As a vegetarian, I dare not dream a world without lentils - my major source of protein. Last week, Alton Brown' Goodeats show was about one of the oldest and most versatile ingredient in the pantry, the lentil. Click the Goodeats to know more about the show and the recipes he tried.


Here are some interesting facts and articles about lentils that I culled from the net. Hope you find them useful.


Nutritional facts :
One cup of lentils, approximately 198 g, a single serving of cooked lentil contains 230 calories. Lentils are a healthy option for a weight loss diet, since they are filling while being low in calories. One serving of lentils contains 18 g of protein and only1 g of fat. There are 40 g of carbohydrate in one cup of lentils, including 16 g of fiber. The fiber in lentils is of both soluble and insoluble types. Lentils have no cholesterol and are low in salt, with only 4 mg sodium per cup.

Health Benefits :
Health magazine has selected lentils as one of the five healthiest foods. They are a very good source of cholesterol-lowering fiber, helps in managing blood-sugar disorders. Lentils also provide good to excellent amounts of six important minerals, two B-vitamins, and protein—all with virtually no fat. This tiny nutritional giant fills you up--not out.

Love Your Heart—Eat Lentils. A study published in the Archives of Internal Medicine confirms that eating high fiber foods, such as lentils, helps prevent heart disease. Lentils can increase energy by replenishing iron stores. Particularly for menstruating women, who are more at risk for iron deficiency, boosting iron stores with lentils is a good idea--especially because, unlike red meat, another source of iron, lentils are not rich in fat and calories. Iron is an integral component of hemoglobin, which transports oxygen from the lungs to all body cells, and is also part of key enzyme systems for energy production and metabolism. And remember: If you're pregnant or lactating, your needs for iron increase. Growing children and adolescents also have increased needs for iron.

Go to your kitchen, quickly cook some lentil and enjoy them as a salad or a soup.

References :
Wikipedia.org, About.com - Home cooking, WH Foods, Live Strong

Friday, December 16, 2011

Cream of vegetable soup


Last weekend we decided to eat out and headed to our favourite restaurant here. As usual the food did not disappoint and we stuffed ourselves up. Guilt began to bite us and we thought a long walk would quieten it. Walked along  the beautifully decorated Orchard Road. Oh yeah, also saw the male models standing outside the Abercombie&Fitch outlet to celebrate the opening of their new shop in Singapore. This is the hot news here, with all the local news channels covering this for the past one week.

The food we had this time was a little different from our usual one. I wanted to try them at home in my style. This cream of vegetable soup is one among them.  Most of the time I prepare tomato soup and red coloured vegetable soup. So I wanted to try this soup since it tasted so rich, creamy and with lots of vegetables, of course the color is different from what I used to cook:)

Very easy to make and satisfies your heart and stomach.

Ingredients :

1 cup -- Cut vegetables
1 no -- Onion (small size)
1 pod -- Garlic
2 cups -- Water or Vegetable stock.
2 tsp -- Corn flour
1 tbsp -- Butter
1/4 cup -- Milk
1/4 cup -- Heavy cream (optional)
1/4 cup -- Grated cheese (optional)
Black pepper and salt to taste

Method :
--- Heat the sauce pan to the medium heat and add butter.
--- Slice the onion, garlic and saute them in the butter. After a minute add the cut vegetables.
*** Choose the vegetables according to your taste. I used yellow and green coloured bell peppers, carrots, peas. Also cut the vegetable to small thin pieces. You can use cauliflower, broccoli, beans, corns, choices are endless.
--- Once they are half cooked add water or vegetable stock, pepper, salt and cook well.
--- Now take the corn flour and dissolve in the milk without any lumps. Pour the mixture to the cooking stock.
--- Cook until a creamy thick soup is formed. It will take about 3 - 5 minutes.
--- Last stage. add heavy cream and cheese and mix well . Turn the heat off.
--- Heavy cream and cheese are optional, this adds more rich taste to the soup.
I did not use cheese in this soup. Without that itself my soup tasted just like  the one we had in the restaurant.
Restaurant style cream of vegetable soup is ready to serve at your table.

Thursday, November 24, 2011

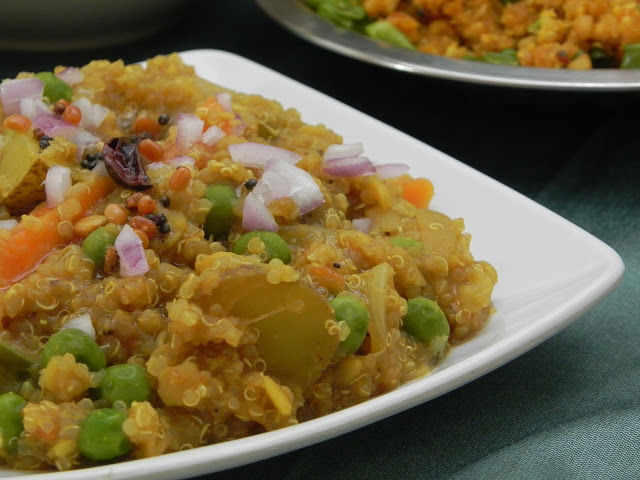
Quinoa Bisibelabath

I had a good time in Chennai this time. After two years of our marriage this is the first time we were with our parents for Deepavali. Everybody was happy and excited, including the rain God. He was so happy and didn't let me go out for shopping too... Thank God, I did my shopping here in Singapore itself.
Hope you all had a good Deepavali too.

Coming to our recipe, this is the same Bisibelabath from another angle. Oh I am not talking about the photo angle :D


Okay, what new this time? Tried Bisibelabath with quinoa.

Quinoa bisibelabath, the recipe is the same as cracked wheat. Only difference is cooking quinoa. I cooked a cup of quinoa sepeately and did sambar seperately and then mixed both. As a last step , seasoned the quinoa mixture with mustard seeds, jeera and lots of channa dal and urad dal.
I cooked quinoa seperately because it heps to retain the texture of the quinoa without going all mushy. If you like you can follow the same procedure like cracked wheat. For cracked wheat bisibelabath recipe, click here.
Enjoyed the delicious bisibelabath with crunchy vadam and with beans paruppusli.

Saturday, October 15, 2011

Besan milk burfi


Just a little over a week go for Deepavali! We have booked our tickets to go to India the coming weekend. My Deepavali purchases? I am warming up. Bought a nice designer sari last Sunday from Lavanya Arts and Crafts. Will definitely contribute to Chennai's economy too!

While I am happy that I will be celebrating the festival with my family, I am more excited about the 'batchanam' gallata. I cannot wait to get into the kitchen with my mother-in-law to try new as well as traditional sweets and savouries with my in-law. Started my foundation for that. Making my grocery list now itself, this will save time :) Clever girl !

As a part of the foundation work, I tried this besan flour burfi yesterday.


Besan burfi, very easy recipe. No special ingredients needed, we can make this yummy burfi with easily available ingredients from our pantry with in 20-30 minutes. I tried this milk besan burfi from the site  'momreceipebook'  

All you need is a cup of besan, ghee, milk powder and 1-1/2 cup of sugar. Nuts of your choice and 4-5 cardamom pods. You can find the recipe in here.

--- I did little variation from the original recipe. I used 1/2 cup fat free vegetable shortening for roasting the besan flour.
--- For sugar syrup I added only 1 cup of water instead of 2 cup as mentioned in the original recipe. This is my mom technique. She always say if you are making sugar syrup or jaggery syrup, use less water. So that we can achieve our consistency quickly.
--- I used 1/2 cup ghee when mixing the besan + milk powder mixture with the sugar syrup.
--- Also added 1/2 cup of dessicated dry coconut to the mixture.


I layered the greased wax paper on a plate and transferred the hot gooey mixture on the paper and topped with dry toasted cashews. Then using a greased knife I cut the burfi  to 1 inch square shape.

Easy besan milk burfi is ready to serve.

Tuesday, October 11, 2011

Dual Sauce Pasta

Hope you all had a wonderful Navaratri. I had a blissful time filled with pooja in the mornings and with some wonderful dance and music performances by the students of Temple of Fine Arts in the evenings. It has been 3 days since Vijayadasami but I still have not fully gotten out of the Navaratri mood yet!!  Hopefully getting back to blogging will help me parachute back to reality. So, here comes, with twice the processing power...err.. I mean , twice the goodness of your normal pasta - The Dual Sauce Pasta!!


You can taste the hot and spicy taste from the vegetable sauce and a nice creamy cheesy tangy, garlicky taste from the white sauce. I found this interesting recipe while watching the  Food Network show '30 minutes meal' hosted by Rachael Ray. Of course she used a meat sausage and some chicken stuff in her red sauce, but I tried it in my style with whole lot of vegetables.

Ingredients :

1/2 lb -- Pasta

For Red Sauce
1 No -- Onion big size
1 No -- Roma tomatoes
1.5 to 2 cups -- Diced vegetables
1/2 cup -- Tomato puree
3 - 4 tsp -- Chili powder
100 gm -- Fresh paneer cubes (optional)
3-4 tbsp -- oil
1 tsp -- Garam masala powder
2-3 tsp -- lemon juice
Salt to taste
Few Cilantro to garnish

For White Sauce
1 cup -- Milk
4 tbsp -- Butter
2 tsp -- All purpose flour
1 -2 pods -- Garlic
1/2 cup -- Cheese
Black pepper and salt to taste

Method :
First comes the red vegetable sauce
--- In a pan add the oil and heat the pan in a medium flame. Once it is hot add the paneer cubes and fry until the crust turns slightly brownish.
--- Take the paneer out and keep it aside. In the same pan, add the diced onions and cook until the onions are soft.
--- To the onions add cut vegetables and the diced tomatoes. I used beans, carrots, potatoes, frozen corns, green bell pepper and peas.
--- Add tomato puree, chili powder, salt and little water to the vegetables and  cook until the vegetables are soften.
--- I like to have a little heat in my veggie sauce, which will  balance out the creamy sauce. You can very much adjust the chili powder according to your taste.
--- Add the fried paneer, garam masala powder and lemon juice and mix well. The colourful vegetable red sauce is ready.

Now comes the White Sauce
--- Before we start the sauce, cook the pasta as per the instruction given. You can try this recipe with any shape pasta.
--- Take another pan in low flame, add butter. Once it is melted add couple of teaspoons of all purpose flour. This all purpose flour helps to thicken the white sauce.
--- It will be good if you add the flour in initial stages, so that it will be cooked and also no lumps will be formed.
--- Fry the flour until nice aroma comes from the butter flour mixture.
--- Add a cup of milk to the mixture and cook. The milk will cook the flour further and  thicken the white sauce. If you need more sauce, you can dilute with water or more milk.
--- Grate the garlic, and add to the white sauce along with salt and pepper.
--- Add the cheese and mix well. Put the flame off and add the cooked pasta and mix well.


How to serve
--- Take the serving plate and put the creamy cheesy pasta in the middle of the plate.
--- Make a well in the middle of the pasta
--- Now scoop a big spoon full of vegetable sauce and pour into the pasta well.
--- Garnish with chopped cilantro on top and serve warm. 

The colours so attractive and inviting, everybody will love to dig into the pasta well and enjoy the colourful pasta.

Friday, August 26, 2011

Walnut brownies

 Hmm... More chocolate coming on your way to dazzle you. Followed by Hazelnut chocolate fudge  here comes walnut brownies.


Nearly, after 9 months I baked this mouth watering walnut brownies. Remember long long ago, I tried a walnut brownie with chocolate fudge recipe and those brownies turned to brownie walnut balls. To read more about that scrumptious walnut brownie balls, click here.

I tried some new ingredients to substitute eggs. Though it is an experimental recipe, the outcome was perfect. The brownies were soft, moist and delicious.

Ingredients :

1 cup -- All purpose flour
1/2 cup -- Cocoa powder
3/4 to 1 cup  -- Granulated sugar**
1/2 tsp -- Baking powder
1/2 tsp -- Baking Soda
1/2 cup -- Walnuts
5 tbsp -- Butter
1/4 cup -- Condensed milk  (optional)**
1/2 cup -- milk
1/4 cup -- Paneer
1/4 cup -- Banana smashed
2 tsp -- Espresso coffee

Method :
--- Preheat the oven to 350 F
--- Grease a 8" square pan and with wax paper. I strongly recommend to use a wax paper, but as I did not have wax paper in stock when I tried this recipe , I ended with brownie walnut ball.
--- Grind the paneer cubes to a fine powder.
--- Mix the paneer to the sugar, smashed banana, espresso coffee  and milk. If using condensed milk, mix it also with paneer banana mixture.
** I had some left over condensed milk in the refrigerator, so I added the same.
** Brown sugar would have been wonderful, but i had to make do with granulated sugar. If not using condensed milk, adjust the sugar accordingly.
--- Melt the butter in a pan and mix the cocoa powder.
--- To the cocoa mixture add the banana paneer mixture.
--- Shift the all the rest of the dry ingredients. All purpose flour, baking powder and baking soda.
--- Mix the dry ingredients with the wet ingredients.
--- Last but not least, add the walnuts to the batter and mix well.
--- Pour the batter on to the pan and bake it to 25 to 30 minutes until a tooth pick inserted comes out clean.

Enjoy the brownies with whipped cream or serve hot with cool vanilla Ice cream and chocolate fudge topping.

Wednesday, August 24, 2011

Hazlenut chocolate fudge

Chocolate, hmmm yummy...


I made this yummy chocolate fudge a month ago.  But it me took 4 days to get this into its final shape!

Now comes the behind the screen story of this fudge. At the end of the story I will ask a question, If you find the answer, please mail it to me :)
Last month on 27th we celebrated our Swamiji's 6th Aaradhana. I wanted to take some special quick and easy sweet for Neivedhyam. On the previous night, I decided to make chocolate fudge using microwave oven.

In a microwave-safe pan I added a tin of condensed milk and 1/2 cup of cocoa powder and 3 tbsp of butter. Mixed them thoroughly and cooked in the microwave for 2 minutes. Then took it out stirred them along with a tsp of Vanilla essence. Again cooked in the MW oven for 5 more minutes. Transferred the mixture in to a greased pan and cooled it for 2 to 3 hours in the refrigerator. After 3 hours, I was ready and eager with my knife but alas, the fudge was not

The fudge was not set, so I kept it inside the refrigerator the whole night. Next day morning at 5 O' clock again I tried to cut the fudge it was so gooey. Since wanted to go for the Pooja early in the morning, I dumped the same in the refrigerator and rushed to the Pooja.

Next day, I took the fudge mixture in a non stick pan and added 1/2 cup of sugar and again cooked over the stove for 15 - 20 minutes. The mixture was not sticking on the sides. I transferred the same into a greased pan. Again chilled and the same thing happened. So me and my husband, both started to scoop the mixture and to eat the fudge. I kept a spoon permanently in the pan to ease the process and in two days we managed to complete half of the fudge from the 8" pan.

Still I was not convinced with what I made, on Friday 29th I took the pan and cooked in the MW oven for 5 minutes. Stirred well and added some hazelnut milk chocolate which I had in the pantry for more than a month. Approximately 1 cup of chocolate. Cooked in MW oven for 2 more minutes. Transferred the mixture to the greased pan, chilled it completely. Took my knife and tried to cut, voila it was perfect.


So, it is true. Perseverance does pay off!. Its question time, remember I mentioned in the starting. My question is : What is the final recipe and the cooking method of this yummy chocolate hazelnut fudge.

Tuesday, August 9, 2011

Cracked wheat vegetable puloa


After tasting some success with Bisibelabath using cracked wheat, I wanted to try few other rice based recipes using cracked wheat . And also wanted to make it simple one pot recipe to minimize the cooking and washing process. One such try is vegetable puloa. It is more like a cracked wheat upma, but the spices make all the difference, also I used a coarser variety of cracked wheat which gives nice texture and nutty taste to the dish.

Cracked wheat vegetable puloa has become our favorite dish nowadays. In last couple of weeks alone I did this spicy vegetable healthy meal more than 4 times. Cracked wheat is healthy and rich in fibre content, helps to maintain healthy digestion and may help lower cholesterol and stabilize blood sugar.

Ingredients :
2 cups -- Cut vegetables
1 no -- Big size onion, diced into small pieces
1 cup -- Cracked wheat
1/2 cup -- Coconut milk
3-4 nos -- Green chillies
2 cloves -- Garlic
5-6 tbsp -- cooking oil
Salt to taste

Spices :
1 tsp -- Fennel seeds
1 inch -- Cinnamon
2 nos -- Cloves
1 no -- Cardomom
1 tsp -- poppy seeds

Method :
--- Cut vegetables, I used fresh carrot, beans, green bell peppers, cabbage and peas. I am leaving to your choice, you can use fresh or frozen vegetables. Everything will taste good.
--- Heat a pressure pan in medium heat and add oil, once it is hot add all the spices except the poppy seeds.
--- Nice aroma will comes after few minutes, now add onions, vegetables and cracked wheat and saute them for few seconds.
--- Grind the poppy seeds, garlic and green chillies into a carse paste and add to the cracked wheat vegetable mixture.
--- Now add salt,coconut milk and water to cook the mixture
--- Pressure cook the mixture for one whistle.
--- The last 2 step is little crucial, the amount of water and cooking time depends on how coarse the wheat is. If you add more water or cook for more time the texture of the puloa will change a lot.
I added less than 1 and 1/2 cup of water to the cocnut milk and pressure cooked for one whistle.

Vegetable puloa is ready, serve with plain curd and enjoy :)

Wednesday, July 20, 2011

Colorful Kadappa


Kadappa, for me a place in Andra Pradesh, India till two years ago, I never know this as a South Indian recipe. When ever I ask Karthik, what to prepare for dinner, always his reply will be Puri Kadappa or Idli Kadappa, or Pongal Kadappa, the list goes endless with kadappa. I am not kidding, he always asks the same to me. This is his favorite recipe.

Its very simple, rich in flavour and easy to make. Long ago, my in-law told this recipe over phone. I did so many plus and minus to the recipe and arrived this final version. I have not tasted this recipe anywhere still. So I don't know the real taste of the kadappa. All I know is only my version. Longing to taste this recipe soon some where !


Ingredients :

1/4 cup -- Moong Dal
1 no -- Medium Potato
1 no -- Medium size Tomato
1 no -- Medium size Onion
1/2 tsp -- Turmeric
1/4 cup -- Coconut milk**
Few strands of curry leaves
Salt to taste
2 tsp -- Oil
1/2 tsp -- Fennel seeds
1 " length -- Cinnamon

Flavouring Ingredients : To be ground into a fine paste
4 tbsp -- fresh grated coconut
4 tbsp -- Roasted gram
1 no -- Cloves
1/4 tsp -- Poppy seeds (Kasakasa)
1/2 tsp -- Fennel seeds
1 no -- Cardamom
2-3 -- Garlic pods
4 nos -- Green chilly **
Few Ginger

Method :
--- I know you people will be surprised to see a whole list of Masala items in the flavouring column, these ingredients gives that fantastic flavour to this dish. According to your taste, you can add or reduce the items and the amount.
--- Pressure cook the moong dal and potato.
--- While that is cooking, grind all the flavouring ingredients and dice the tomato and the onion.
--- Heat up a sauce pan to medium heat with the oil and once it is hot, add the fennel seeds and the cinnamon stick.
--- Then add the diced onions and saute them for few minutes, add the ground masala mixture to the onion along with the turmeric powder and saute the mixture till the raw smell of the mixture turns into nice aroma.
--- To the onion mixture add the diced tomatoes, curry leaves and cooked dal.
--- Peel the potato skin and dice them into small cubes and add to the dal. According to the gravy consistency add the water.
--- Cook the dal mixture for one boil and turn the heat off. Oops, forgot to add salt. Add salt and mix well before turning off the heat.
--- Now add the coconut milk to the kadappa and mix well. This step is optional, this is the first time I tried it and the taste was extra ordinary.

Hot yummy kadappa is ready to serve along with your wonderful Pongal, Idli, ...

Friday, July 8, 2011

Karuveppilai (Curry leaves) Pasta


Two day ago, I experimented this new recipe, since I wanted to finish a big bunch of curry leaf which was lying in the fridge for a week. And the result for my new attempt is this Indo Italian fusion recipe, Karuvepilai (curry leaf) pasta.

Though its only the trial version, Karthik enjoyed the pasta a lot. After having my first spoon, I was telling Karthik that something was missing. I want to correct it but will not do this recipe next time, because I am not a big fan of curry leaf recipes, so I didn't like it. As usual he encouraged me and had the pasta twice. Me, didn't go for second time :(

When you Cook for two, you will always end up with some left overs. This time, I ended up with little more than usual. The next day, I added some ingredients to the left-overs and had the same. It tasted very good. Hope you all can enjoy the same in the first trial itself.


Ingredients :
1/2 cup -- Curry leaves
3 tbsp -- Urad Dal
4 nos -- Red Chilli
1 tsp -- Dhania seeds
1 tsp -- Asafoetida
1 no -- Lemon
Salt to taste
Multi grain / Whole wheat Spaghetti -- Approximately 1/2 lb or less

Method :
--- Heat a non stick pan in medium heat.
--- Add little oil to fry the urad dal, dhaniya seeda and red chilli. Fry them till the dal color changes to golden red.
--- Let the mixture to cool.
--- Meanwhile cook the pasta according to the direction given on the pack and keep it ready.
--- Once the dal mixture is cooled, transfer them to mixer jar and grind along with the washed curry leaves.
--- Add little water and grind to a paste consistency.
--- Again take the same pan, add little oil and put the paste and fry them in medium heat till the raw curry leaf smell subsides and a nice aroma fills the kitchen.
--- Karuvepilai (curry leaf) chutney is ready. Now mix this mixture to the pasta.
--- If you feel the mixture is too dry to mix in pasta, add very little pasta water and mix well.
--- Add the frsh lime juice to the pasta, to get the tinge of tangy taste.

Tadaan, Indo Italian fusion pasta ready to serve.


Hope you all guessed right. This is the same Karuvepilai chutney we prepare to mix in the rice. Instead of mixing it in the rice, I used pasta.
Okay, now I tell you what I did the next day to the left over pasta. I added lime juice and a dash of salt. I have mentioned the same above. Hope often I try this pasta at home :)

Friday, July 1, 2011

Bisibelabath from a different angle

Hi all, presenting Preethibhojan now from Singapore.

After enjoying 4 months with our family, last month, we moved here. Oh my, the last 4 months, I hardly went to the kitchen.  Learnt some new recipes and many tips both from my mom and from my in-law. Even though I enjoyed regular food like a rice, sambar, curry and rasam, all the time I ended up with a new taste. Wonder how the tastes differs from person to person.

Now I am back to my den, our new home with a big open kitchen. Tuning up slowly to my routines. As a result of 4 months enjoyment me and Karthik put on lot of weight. So we both took an oath to get back into our shape again.

As a result of that, here comes an healthy recipe 'Bisibelabath' from my new kitchen.


If you ask, What is healthy in it ? The answer is Cracked wheat bisibelabath. Is in it healthy !

I moved last week to this home, with some basic ingredients. With that I wanted to try something different and the same time healthy. While this was in back of my mind, I was chatting with one of my friend and a fellow blogger, Priti singh from Indian Khana. While I was talking to her, I came across this recipe from her blog. Tadaan a flash in me, why can't I try bisibelabath using cracked wheat.

Ingrdients:
1 cup -- Cracked wheat
1/4 cup -- Toor dal
3 tbsp -- Chana dal**
2 cup -- Diced vegetables **
3 tsp -- Tamarind paste**
2 tbsp -- Chilli powder**
Salt as per taste
** Tamarind and chilli powder put according to your taste.
** Diced vegetables - You can put according to your taste. I would strongly recommend Red Pumpkin or squash, green capsicum, drum stick.
** Chana dal is optional. Adding this will give a wonderful texture and taste.

For seasoning : Oil, Chana dal, Urad dal, Mustard seeds, 2-3 Red chilli, Asafoetida

Method :
As Priti has mentioned in Indian Khana blog, we have many ways to make this dish. I tried my mom's way. But we do put our secret bisibelabath mixture to enhance the taste. Since I did not have a mixer, I did
without the secret mixture.
--- Take a pressure pan and add cracked wheat, toor dal and chanadal along with the diced vegetables.
--- Add 3 cups of water and pressure cook. Leave only one whistle and turn off the cooking
--- Once the pressure is released, open the cooker and add the tamarind paste, chilli powder and salt.
--- Again pressure cook it for 2 more whistles.
--- When the pressure is released, bisibelabath is ready.
--- Add the seasoning to the above mixture and serve hot with crunchy vadam.

Easy, healthy one pot meal is ready to serve. There will not be much difference from the regular bisibelabath to this.

Saturday, May 21, 2011

Cool Summer salad


Colour colour what colour do you choose ?
Hmmm, Can I go for the golden yellow in Mango or the mild green in mung sprout or the dashing red of the tomatoes 8-}

Colours of mother nature always unique and very hard to replicate. (Even when it comes for artificial colouring. I experienced this when I worked in the fabric dyeing unit for couple of years. Though we use the same machine, same measurement of dyes and chemicals no two batch will have the same colour.  There will be atleast 1-5 % variation in the colour).

No more talk about the colour technology. Come, lets have a a nice colourful cool salad.

Ingredients :

1 no -- Ripe mango
2 nos -- Carrot
1 Cup -- Sprouted Mung dal
4 nos -- Okra
1 no --  Tomato
1 no -- Onion
1 no -- Cucumber
Salt to taste
Pepper -- Optional

Method :
-- As you all know, there is no much big step for any salad.
-- Thinly slice all the vegetables and mix well.

Health benefits of some ingredient:

Okra -- A powerhouse of valuable nutrients, nearly half of which is soluble fiber in the form of gums and pectins . Soluble fiber helps to lower serum cholesterol, reducing the risk of heart disease. The other half is insoluble fiber which helps to keep the intestinal tract healthy, decreasing the risk of some forms of cancer, especially colo-rectal cancer (Source -- by Prema Raja, Suleka.com)

Mung Dal -- Ratna Rajaiah, calls the Mung dal as 'The Queen of Hearts' in her book, How the Banana Goes to Heaven.
Dietary fibre, contains high source of Vitamin B. Like Okra, this also plays major role in reducing the risk of heart disease. Controls blood sugar.
Especially for ladies, the vitamin B2 in mung dal plays vital role for healthy eyes and clean shinny skin.
Cucumber -- Contains Vitamin C and minerals like silica, potassium and magnesium, which is mainly helpful for good skin complexion and also for all skin related problems. Cucumber is a high source of dietary fibre, maintains blood pressure level and more. (Source -- WHFoods)
 
Mango -- Mangoes are an excellent source of carotenes, vitamin C, vitamin B, vitamin E, copper, potassium, and magnesium. Recent studies proved that mango can be used to cure cancer, reducing risk of kidney stones and many more.  Digestive enzymes in mangoes will help to break down proteins and aid digestion. Mangoes are used as medicines in Ayurveda and Unani. (Source -- Elements4health)

You can enjoy this cool salad as such or try like me. I enjoyed this with crunchy tangy javvarasi vadam like this.

Wednesday, May 11, 2011

Summer Special 1 - Tangy Javvarsi Vadaam


Javvarsi vadam, the best side dish for the all the rice.

Vadam laid out to dry in my terrace. I am happy to be a part of this big vadam project. Last month, I went to my hometown and spent some days with my parents. My sister and my brother also joined me. It was a family reunion after 2 years with lots of fun with some sad moments.

As I said in my earlier post Maavadu, my mom work like a factory and makes pickles, vadams. As the summer season comes, she makes yummy homemade vadams and distributes to all. Oh yes, she sent some to Chicago too.


Since we all were there, my mom did little extra this time. While myself, mom and my sister-in-law were working on the vadam, my sister took care of the two vaalu kids.

Ingredients :

1/2 kg -- Javvarsi / sago
100 gm -- Green chillies
2 nos -- juice from Lemon
Salt as per taste
** Since this is my mom's recipe, all the measurements are in weight.


Method :
--- Soak the javarsi over night. Let the volume of the water be double the volume of javvarsi.
--- Next day morning, wash the green chillies and grind them to a fine paste . As you all know the measure of chilly depends on one's taste. So adjust accordingly.
--- Take a big thick bottom vessel with 2 litre of water and bring it to boil.
--- Once it starts boiling, add the javvarsi,  chilly paste and cook. You can very much control the chilly now also.
--- Accordingly add salt to the mixture and cook until javvarsi is cooked fully and becomes transparent pearls.
--- The whole mixture becomes little thick, like kanji consistency.
--- Turn thr heat off and let it cool for few minutes.
--- Pour the lemon juice to the mixture and mix well.
--- Vadam kuzhu (liquid mixture) is ready.

--- Now comes the big part. Take some big plastic sheets and wash them thoroughly and drip out the water completely. You can also use white cloth for laying the vadams. But we prefer the sheet because, its easy to peel the vadam.
--- Lay the plastic sheet in the open terrace or where you can get proper sunlight and secure all the corners.
--- Now take the liquid mixture in a small spoon and place it over the plastic sheet.
--- The size of the vadam is up to your imagination. Place the vadam mixture in a row with some space between two, because when it spreads it will not touch the next in the row.
--- After a day if it comes peel the vadam from the sheet and dry it for 4-5 days until whole water is absorbed.
--- Then store it in a airtight box.

Always try to keep this vadam project in the early mornings before the sun. Fry the vadam in the oil or cook it in the microwave oven and enjoy when ever you want a crunch.

We enjoyed this tangy vadam along with a summer cool salad. Will post the salad recipe shortly :))

Thursday, April 28, 2011

Easy peasy biscuit canape

Grab one soon before it gets over...

Canape - an appetizer consisting of a thin slice or piece of bread toasted or fried in butter or oil, on which anchovies, mushrooms, caviar, cheese, or other savory foods, are served (Source: thefreedictionary.com)


How happy it will be when our kutti kutti childhood desire comes true after many years? I felt the same today after clicking these colorful cool canapes.

Long long ago, me and my sister saw a biscuit advertisement in a magazine in which the biscuits were topped with many layers and served colorfully. That time we did not know much about the cheese and toppings, so we simply used a Maggie tomato ketchup.

After many years, the time I started to know much about cooking and special ingredients used to give catchy look to the dish, I realized how simple it is to do topping over a biscuit. When I tried this biscuit canape today, the 12 year in me took over and I thoroughly enjoyed every moment of preparing and serving this dish.

Ingredients :

Salt biscuit for base.
Cheese slice of any kind.
Thinly sliced mixed vegetables
   -- Carrot,
   -- Cucumber,
   -- Onion,
   -- Cilantro,
   -- Tomato.
Grated cheese and crunchy savory mixture.
**Note : There is no specific measure for the ingredients, prepare as much as you like. I am not going to restrict by giving the measurements.

Method :
--- This easy peasy biscuit canape is very simple, its only layering of all the ingredients.
--- Arrange the biscuit over the serving plate. Choose the plate according to your theme, because once we start layering it will be difficult to change the plates.
--- Take the cheese slice and cut into small squares or triangles according to the size of the biscuit.
--- Place the cheese slice over the biscuit as a second layer.
--- Take a spoonful of mixed vegetable and put it on the top of the cheese. This forms the third layer.
--- To make it little more crunchy, top the vegetables with little savory mixture.
--- Drizzle some finely grated cheese as a last layer.
--- The easy peasy biscuit canape is ready to rock the party

Variations :
--- You can use vegetables like green, red or yellow bell peppers, will give nice color to the plate.
--- Also to make it little spicy, you can use any ketchup in the bottom layer.

These canapes will be a best for any parties or quick snacks. Easy to make and so colorful to look.

Tuesday, April 26, 2011

Maavadu - Tender mango pickle

Hurray, Its mango time again...
The time the mango season starts, the pickle season starts in our home. Maavadu, is a pickle made out of cute little tender mangoes.

My mother makes pickles like a factory and distributes it to all of us. For the past 2 years, she had it delivered to me in Chicago too. My sister resides in Mambalam and has ready access to almost anything you name. Specially in the summer she gets loads and loads of mangoes. The list starts from Maavadu mangoes, then Aavakaai mango, mangoes for vathal, thokku and of course mambazham.  We finished the first batch of Maavadu at home a couple of weeks ago and my mother prepared another batch last week.

Ingredients :

1 padi** -- Maavadu, small size tender mangoes
50 gm -- Mustard  seeds
4 tbsp -- Chili powder
3 tsp -- Turmeric powder
2 tsp -- Castor Oil
150gm to 200gm -- Powdered salt

** Since this is my mom's recipe, all the measurements are in weight.
And the padi is the old method of  measuring unit, still used in some places. My mom and my in-law talks more often with this unit. Since they used to cook for big families.
1 padi approximately equals 8 cups

Method :
--- Wash the mangoes and dry them completely by spreading over a dry cloth.

Photobucket
--- After drying the mangoes, transfer the mangoes in a bowl or a jar in which you are going to store the pickle. Pour the 2 tsp edible Castor oil  over the mangoes and mix well and make sure all the mangoes are coated with the oil.
--- Grind the mustard seeds to powder.
--- Add chili powder, mustard seed powder, turmeric powder and salt to the mangoes.
--- Mix well and close the bowl / jar with a lid.
--- Utmost try to use a dry wooden ladle to mix the mangoes or use clean dry hands.
--- Mix the mangoes daily for at least for a week to 10 days in the morning with wooden ladle, once the skin shrinks and the salt become watery, the pickle is ready to use.
--- Taste a mango after 3-4 days, if you feel it needs more salt. Go and grab the salt jar from the pantry and add to the mangoes.

--- Yummy tender mango pickle is ready to rock.


Important note :
1) If the salt is more the life span of the pickle will also be more. If salt is less, then the pickle will be infected with fungus growth. So always better to check the mangoes daily.
2) Also use dry spoon to take the mangoes from the big container you stored.

If you follow the above two instruction you can store in the air tight container or ceramic jar in the room temperature itself and will lasts for more months, provided the consumption level, unlike us:-), is less. Or else you can even store it in a fridge and it will last for years.

Friday, April 15, 2011

Vishu Special - Idichakka thoran (Jackfruit Curry)

             Happy Tamizh new year and Vishu

It is very nice to be in our homeland to enjoy special dishes on special occasions. Though we cook the same recipes during ordinary days, we will not the get that divine festive taste in that recipe. Idichikka thoran, is one such special recipe for Vishu.

Cute little Young Jack fruit
Jack fruit is called as 'Idichakka' in Kerala. Jack fruit is a tropical plant which is found mainly in southeast Asia and some parts of Africa. You know, Jack fruit is highly nutritious fruit. I read many more interesting facts about this fruit in a book called, 'How the Banana Goes to Heaven' by Ratna Rajaiah. How I bought this book ? Its a nice short story. A couple of days earlier me and Karthik were at the Passport office. As usual nothing happened as per the schedule, so to kill the time we went to a nearby book shop, where I chanced upon this beautiful book.

Jack fruit
-- An antioxidant which fights diseases.
-- High in beta carotene which our body converts into Vitamin A.
-- Rich in dietary minerals like potassium and Iron.
-- Contains more calcium and magnesium than Banana.
-- Excellent source of complex carbohydrates and dietary fibers, makes the fruit as an energy food.

Like the fruit, the seeds inside them are also equally good for health. They are also high in Vitamin B1 and Vitamin B2, Also minerals like calcium, zinc, phosphorous and Sulphur.

First time in my life, I tried this Idichakka. My mother in-law helped me in cooking and Iam in love with this this wonderful recipe.


Ingredients :

1 no -- Small young jackfruit
1 tsp -- Turmeric powder
1 tsp -- Mustard seeds
1 tbsp -- Chana dal
1 tbsp -- Urad dal
1 tsp -- Jeera
3 no -- Red chillies
2-3 tsp -- Oil
Salt -- To taste
Few Curry leaves
** 1 no -- medium size onion
** 1/2 cup -- Grated coconut

** Onion or coconut -- according to your taste.

Method :
--- By using sharp knife, cut a thick layer of about 1cm skin from the fruit. Apply some oil to the hand and to the knife to avoid the gum sticking in your hands.
--- Cut the fruit into big chunks.
If using a very young jack fruit then no need to discard the center stem inside the fruit, if not cut the stem too.
--- Cook the big chunks along with the turmeric and 1 tsp of salt in the pressure cooker for 1 or 2 whistles.


--- Once the cooked jack fruit is cooled completely, by using a fork or hand shred the big chunks. Since it is cooked nicely all the fibers can be shredded easily. If you find difficulty put it in a mixer and just run for one or two times. Don't run continuously, then all the fruit will get smashed.
--- Put a pan in medium heat and add oil and after few minutes add mustard seeds. Once the seeds are popped completely add chana dal. urad dal, chillies, curry leaves and jeera.
---*** If you are using onion, cut them in to small pieces and add them to the oil mixture and fry until the onion become translucent.
--- Add the shredded jack fruit to the oil mixture and add salt according to taste.
--- Mix well and fry the jack fruit mixture for few minutes.
--- *** If you are not using the onion, avoid the onion step and add the  grated coconut in the final stage and turn off the heat.


Enjoy the Idichakka thoran along with Vishu special pradamans :))

Tuesday, March 22, 2011

Its Mango time... Mango rice

March month is marching fast. One side cricket world cup, other side board exams, in between elections. Oh, the days are really running fast. The good thing about this month are the fresh mangoes. The green fresh mangoes are already in the markets.

I like to eat mangoes in all the form, fresh green mango, pulpy fruit mango, dried mango pickles, yummmm. My mother will make different variety recipes using the mangoes. Starting from March till May, almost daily we have mango in our meal. Either it will be in sambar, pickle, pachadi, rice, vatha kuzhambu, thokku, mango paruppu, etc. Living in the US for the past couple of years, I missed mangoes a lot. We do get mangoes all through the year and mangoes imported from India during the summer but it was that very rare bunch that had the taste and flavour.

Mangoes are rich in vitamins, minerals and anti-oxidant.These comforting enzymes act as a digestive aid and can be held partially responsible for that feeling of contentment we experience during and after our daily mango ritual. An average sized mango can contain up to 40% of your daily fiber requirement. (Facts : All about Mangoes)

In this season, I bought a couple of mangoes yesterday and tried one of my favorite recipe Mango rice.


The recipe for making the rice is very simple. It is more like making lemon rice.

Ingredients :

4-5 cup -- Cooked rice
1 no -- Mango**
1 tsp -- turmeric powder
1 tsp -- Mustard seeds
1 tbsp -- Chana dal
1 tbsp -- Urad dal
1 tsp -- Jeera
3 no -- Green chillies
Salt -- To taste
2-3 tsp -- Oil

Method :
--- Wash the mango, peel off the skin and grate it.
** Select the sour mango fot this recipe, you will enjoy it better.


--- Keep a pan in the medium heat, add oil. Once the oil is hot add the mustard seed, once its popped, add jeera, chana dal and urad dal.
--- Once the dal color is fried, add the grated mango, turmeric powder and green chillies.
--- Saute the mango for 5 minutes. Since we are using grated mango, cooking will be very fast.
--- Now mango mixture it is ready to mix.
--- Add the mixture to the mixed rice. According to your taste, add salt. You can add salt either in the last stage or while you saute the mango.

--- The rice is ready to serve.

Thursday, March 10, 2011

Sundaikai curry


Sundaikai, Turkey Berry in English, is a very popular in Tamilnadu. Commonly prepared as vathal, dried sundaikai, this can also be cooked freshly to make curry, kootu, sambar, kuzhambu, pachadi, Thuvayal, etc..

Sundaikai contains high medicinal value and is very good for health. It is rich in Iron content and it acts like cleanser to clean our stomach. It is widely used in Siddha medicine for making chooranams, which is helpful for digestion problems. Even now most mothers feed sundaikai vathal to her daughter, after she give birth to a baby.

Earlier days, in our town almost every house had the plant in their back yards. I can recollect a lot of days when we ran out of vegetables at home and the fresh sundaikais from our (and our neighbours :-)) backyards saved the day. My mom makes sundaikai vathal at home itself. But now I am paying Rs.20 for 1/2 cup fresh sundaikai. Still its worth buying.

Last week, my mother-in-law made this wonderful curry. I never had this type of sudaikai curry before. Hope the image does justice to the wholesome taste of the curry.

Ingredients :

1 cup -- Fresh Sundaikai
1/4 cup -- Shreded coconut
1 tsp -- turmeric powder
1 tsp -- Mustard seeds
1 tbsp -- Chana dal
1 tbsp -- Urad dal
1 tsp -- Jeera
Salt -- To taste
2-3 tsp -- Oil

To fry :
1/2 cup -- Urad dal
1/4 cup -- Chana dal
2-3 tbsp -- Dania seeds
4-5 nos -- Dry chilli
2 tsp -- Pepper
Few curry leaves
1 tsp -- Asafoetida

Method :
--- We always get the sundaikai with the stem. Take the stem part, which will easily come off and wash it thoroughly.


--- After washing, take them in a zip lock bag, I prefer to put one more bag.
--- Now comes the messy part, take a small hammer and smash all the sundaikai. You no need to work hard for this, since those are very delicate, it will be smashed easily.
Before washing Sundaikai
--- Transfer the sundaikai in to a pan and wash out the seeds completely.
--- That's it, cleaning part is over. Cooking sundaikai is similar like cooking beans curry.
--- Take a pan and add all the ingredients listed below 'To fry" and fry them in the medium heat.
Fry till the dal color changes.
*** Important note - Adjust the chilli and pepper measure according to your taste. Don't blame me later :))
--- Transfer the fried mixture to a blender and let it cool for a while.
--- Keep the same pan in medium heat and add oil. Once the oil is hot, add mustard seeds. As soon as the seeds crackles add chana dal, urud dal and turmeric.
--- When the dal colors changes add the washed sundaikai.
--- Add little water to cook and close the pan.
--- Meanwhile grind the fried ingredients with a spoon of jeera and coconut. This is called as curry podi. You can use this for almost all the vegetables.
--- Now check the sundaikai, if cooked add the curry podi.
*** You can add the curry podi according to the taste you like. If you have some left-overs, store them in air tight container. As I said earlier, this will be good for any curry, also you can add this in sambar.
--- Add salt according to taste and cook for 3-4 minutes and turn off the heat.

Yummy Sundaikai curry is ready to serve with hot rice :)

Wednesday, March 2, 2011

Lovely Award !


Gayathri Viswanathan from 'Kitchen - The Chef's Paradise' , a good friend and a fellow blogger of mine passed this 'Lovely Blog Award' to me along with few others bloggers. I thank Gayathri, a lot for sharing this award. I am so happy and honoured. Hurray,This is my first award !

Long long ago, in the month of December, Gayathri tagged me in the 'tagging chain questionnaire'. Since I was little busy with my cake decoration classes and pongal celebrations, I totally forgot the questionnaire.I take this opportunity as a right time to answer her questions and the original questions posted by Shobha and Shanavi.

Shobha and Shanavi's Question :

1. Are you a vegetarian, or have you thought about being one?
--- Yes

2. Who inspired you to cook or bake?
--- Cooking of course from my mom, mother-in-law, Chitra mami - my aunty, Priya - sister.
--- Baking, after seeing a lovely oven in my apartment.

3. How do you celebrate a favorite holiday of your choice?
--- Any festivals or holidays I like to celebrate with my family. We cook different varieties of foods at home and chat, play and have lots of fun.

4. Do you prefer to celebrate New Year's Eve with friends and/or family, or prefer to ring in the New Year quietly, and privately, at home?
--- Quietly, I celebrate the New Year's day with my family. Early morning, we all go to a nearby temple, where we usually give for Abishegam. We all have hot chakara pongal, Sundal, Milagu vadai as prasadam as well as our breakfast. After that we call all our friends and relatives and wish them.

5. If someone were to ask you to bring dessert to a party, what would you bring? Store bought, or homemade, and if you were to make homemade, what would you make?
--- Whether its a party time or a regular days, I always go for a freshly cooked food. If I were asked to bring a dessert I will take carrot Halwa, Karthik's favorite or a nice double layer chocolate cake with chocolate frosting, my favorite.

6. How will you celebrate your next birthday?
--- This year birthday was a most memorable one. Next year wishing to be with my family.

7. Do you have a New Year's resolution-and will you be sticking to it?
--- No :)) Good girl !

Gayathri's Questions :

1.What is your take on organic food , is it a big deal for you ?
--- After seeing a documentary called Food Inc, I wanted to go more organic. I am trying to stick to that.

2. Do you time your breakfast,lunch & dinner or eat when you are hungry ?
--- When working I didn't had any timing, If I were in office at lunch time I will eat, or else I will skip. But now, everything on time.

3. What is your inspiration to write a food blog ?
--- After we moved to an apartment in US, I was very happy to have a full size kitchen. My love towards cooking made me to explore the web a lot and try many new recipes. After few days, I realized that I need to keep a log of the recipes that I am trying out. So started writing my own food blog under 'Preethibhojan'.

4. How do you get new ideas for recipes?
--- Ideas for new recipes always depends on ingredients I have in my pantry. Sometimes I will start with one recipe but the end result will be bad, that time I will do slight variation and give the recipe a new name and look. Its all in the game !

5. Name three ingredients you consciously avoid or eliminate even when the recipe calls for it ?
--- Most of the time, I will choose the recipe which is very simple and with the ingredients which I use regularly. I avoid Egg, more masala items.

6. Name three things you have to use in most recipes?
--- Turmeric, Methi seeds, cumin

7. How important is eating meals together as a family to you?
--- When we were kids, my mom taught us and insisted more on having meals together. Since we all are running crazy in the morning, we atleast have our dinner together and discuss our days experiences.
8. You do not like a particular dish at your favorite restaurant, what will you do?
--- We hardly go to restaurant. Silently avoid it and let others who might like the dish to enjoy it.

Sunday, February 27, 2011

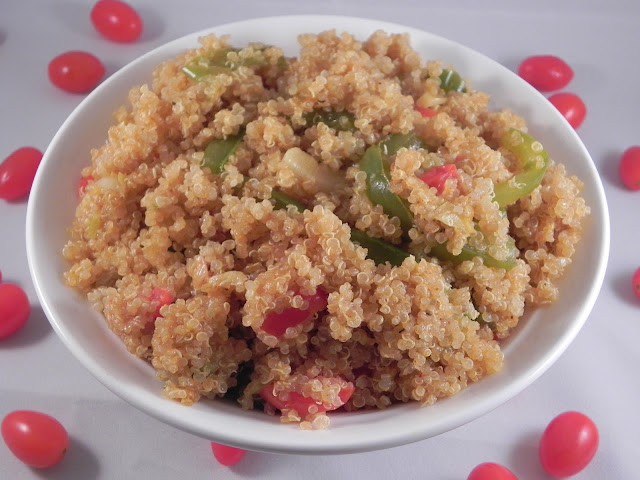
Quinoa Pulao

I m back into my blogging world, after a small gap. I m in Chennai now with my in-laws. Missing my kitchen and specially the oven.

Quinoa, Kinwa, I am still having a problem in pronouncing the name correctly.

Hope everybody knows the nutritional fact of this grain. It is rich in protein and contains essential amino acids. It is a good source of dietary fiber and phosphorus and is high in magnesium and iron. Quinoa is gluten-free and considered easy to digest (Source : Wikipedia)

Quinoa is a high-fiber food with five grams of fiber per cup (cooked). Fiber not only promotes digestive health, but may also reduce the risk of breast cancer in pre-menopausal women, may prevent cardiovascular disease and diabetes, promotes weight loss, and aids weight maintenance (source:Suite101.com)

Do you know, 'Thinai', (tamil) grain is similar to quinoa.


Even though I have read many good things about this grain earlier, I did not take any attempt to try some recipe using quinoa. Last month, when we were buying our weekly grocery, I came across a shelf full of quinoa. I was thrilled and without any second thoughts I took a pack and tried a vegetable puloa. 

--- Cook the quino as per instruction given on the pack
--- As we do for vegetable pulao, cook the vegetables* and keep separately.
--- Mix the cooked quino and the vegetables.
--- If you like add some fried cashew and serve warm.

Easy and healthy recipe. I brought 2 packs along with me to Chennai, going to try more recipe for my father-in-law. Hope this will be the best dietary food for him.

* Vegetables -- Any fresh veggies, as per your taste and availability.

Thursday, February 10, 2011

A Upma with many names

Morkali upma, khozamaa upma, Arisi upma, Morkuzh upma - one upma with different names. If you call by any other name, please write to me.


This upma is traditional recipe but not a popular one. If you ask your Paati (granny) or Kollu paati, she will tell you about this upma along with a nice old stories. Hearing the old stories, oh man, that's the best moment in your life. Sometime if my mom and her brothers were together, we kids will ask about their childhood. They used to talk about their childhood, school days, nick names, movies, books and the delicious food. Hope I will enjoy the same moment when I meet them all next month. Can't wait to see them all !

Whenever my mom prepare this upma, she always talk about her mom and the kitchen arrangement in the earlier days. No gas, no kerosene stove, my paati used to prepare in the traditional coal stove called 'kumuti adupu'. My mom prepares this upma in the same way except the coal stove.

I never tried this recipe until a month ago. Believe it or not, within this last 20 days I did this upma twice. Its an easy recipe, need no special ingredients or even a side dish. It will be best with a side dish, which I will tell  later.

Ingredients :
1 cup -- Rice flour
2/3 cup -- Yogurt (will be nice if it is little sour)
1 cup -- Water
1/3 cup -- Oil (Trust me, you need it)
1 tsp -- Turmeric powder
2 tbsp -- Urad dal
2 tbsp -- Chana dal
1 tsp -- Mustard seed
Dash of  Asafoetida
7-8 nos -- Red dried chillies or Mor millagai
Salt to taste
Curry leaves (optional)

Method:
--- In a bowl mix the rice flour, turmeric powder, Asafoetida, salt, yogurt and water.


--- Make the batter watery, like below. No harm in adding more water, if you need to get this consistency.


--- Take a heavy bottom pan with the oil. Turn the heat to medium. When the oil is hot, add mustard seeds and once they are cracked add the urad dal, chana dal and dry chillies. If you are using mor millagai, adjust the salt accordingly.
--- If using curry leaves, add them also now.


--- Fry the mixture until the dal colour is changed to golden brown. Now slowly and carefully pour the rice flour batter to the oil mixture.
--- The main important thing, don't use spatula and disturb the mixture. Big surprise is awaiting at the bottom of the pan.
--- All the oil will be floating on top of the mixture, don't panic these oil will be absorbed once upma is cooked.

--- Close the pan and cook the mixture for 10-12 minutes, once cooked take a wooden spatula and mix the upma without touching the bottom of the pan. Shhhh that's the secret, we talked earlier.


--- Now comes the magic. Once the upma is being mixed, the oil which was floating above will get absorbed. This increase the flavour and the taste of the upma.
--- Transfer the upma onto a bowl and now you can see a thick layer, called Kaanthal in tamizh, stuck onto the bottom of the pan.


--- Let the pan to cool for a while. Using the wooden spatula, take the upma which is struck in the bottom of the pan. This is a little work, but your hard work will be paid at the end.
--- You will get a nice crispy, tasty Kaanthal from the bottom.


--- This is the best side dish to eat along with this upma. If you don't want to have crispy part, just mix the recipe  in the first stage itself. Then you will not get the fun tasty crispy upma at the bottom of the pan.

Isn't this upma simple and easy. Enjoy the traditional tasty upma with your family and talk the old stories.